Okay, shadows! Those funny dark patches behind objects that sun seems to create 🙂

One of those “spot 10 differences” pictures
Unlike real world, where sun adds lit areas on surfaces (yep, shadows are places where sun did not create illumination), in virtual world it is the other way round – shadows are added on to surfaces. And done so dynamically!
Being real-time strategy, it implies that Knights Province needs real-time shadows, right? Well, there are basically two approaches to dynamic shadows in games:
- Stencil shadows
- Shadow map
There are other shading techniques as well, but most of the time these two and their variations are used. First one is kind of “vector” and second one is like “raster” – each having its pros and cons, but I won’t focus on that much. This is KP development article after all. Just a small resume:
Stencil shadows: To use stencil shadows, game needs to compute projected geometry (which is complicated) and then render it in two stencil passes. Resulting shadows are precise, but hard-edged, so additional trickery is required to make them look smooth.
Shadow maps: Much simpler algorithm that gives out smooth shadows easier. It can be easily added with minimal changes to the code.
How SM works: we move our virtual camera to match the light’s position and rotation, then we render what we see into a texture, recording only depth (distance from camera/light) values. Now when we switch back to usual render, for each rendered pixel, we can compute its position within lights view (as if we were viewing from the light again). Given that position, we now can compare its computed Z value (depth) with the one recorded in texture (remember, in depth texture closer objects overlap farther ones). If the values match it means nothing was in front of that pixel – the pixel is lit, otherwise it must have been occluded with something located closer to the light and that means it is in shadow.
So one of the first tasks is to rig the depth render to a texture. Here’s how it looks for the camera view:
Switching the camera to look from the lights view:
Since we need only depth info for the depth texture, we can apply simplest optimization – do not apply any surface effects when we render to depth texture, such as color, textures, lighting, fog, etc. Shaders become much simpler and run much faster. Of course this makes the render more complicated – now each used shader needs a “full” and a “light” version. More about that below.
Okay, so we have shadows, but they look not very spectacular, kind of pixelated in fact:
There are ways to deal with that. First and simplest – apply texture filtering. That gives soft pixelated edge. Next we can do some blurring:
Fine-tuning setting takes a while: picking the texture resolution, sampling area, sample count and bias. For players convenience, the game will feature several user-friendly settings in menu – Off/Low/High.
To tune the settings I have passed changeable values into the shader on render. Performance drop came unnoticed – what before worked at 90fps, dropped down to 15. Investigation showed that variables used in GLSL loops cause the rendering to slow down massively, because shader compiler cannot foresee which value will be there and apply optimizations (e.g. unroll the loop). There’s a clever workaround for that: since variables are bad, they can be replaced with constants – which are set in compile time and thus allow for optimizations. Now each time some setting is changed, shaders get flushed and regenerated anew. Surprisingly, that takes only a fraction of a second. And thus we are back at 90fps!
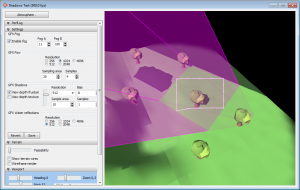
Another issue has to be sorted out – shadows need to work well at each zoom level, from extreme closeups, to birds-eye view. To achieve that, volumetric geometry task has to be solved:
One has to construct such view frustum for light (purple shaft box) that encompasses everything that camera can see (white rectangle on terrain, shrinked for demonstration purpose). Took me a couple of days to figure out the right steps. Now as you can see on the screenshot above, light frustum (purple box) precisely surrounds outlined white area.
And now, this is how it looks in the game:

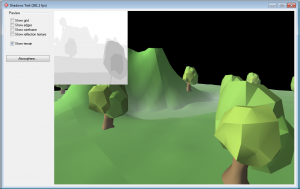
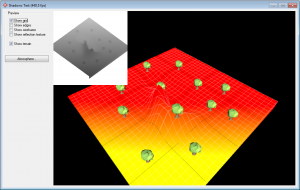
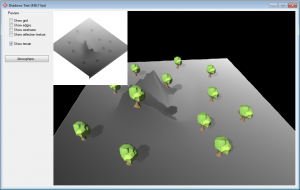
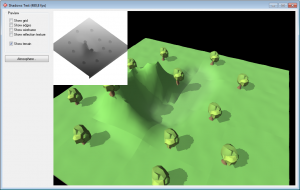
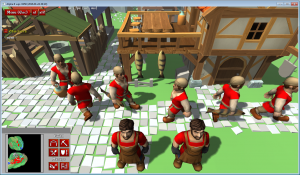
It looks great!
One massive post…. Love it 😀
Thanks for the update on the progress and amazing to see the progression of the shadows. 🙂
From preview to working with 90 fps in quite a short amount of time. 😀
Thanks for the feedback!
All-in-all, there was just one medium-sized problem on the route – fitting view frustum into lights frustum. Even with that, shadows were made relatively quick, in under one week of hobby time. Best cost/effect feature so far 🙂
Hi Krom, thanks for the post. Shadows look great.
I have another question:
Did you think about weather changing?
It would be great, implement seasons like in Settlers 6. In the winter rivers are frozen. Fishermen can’t fishing, and enemies can attack from the water side.
Hey, thanks! 🙂
Weather effects .. likely .. but much, much later in development.
Nice post! I have a question. How do you handle shadow “swimming” when changing distance/camera angle? Did you have any problems with peter-panning/acne?
Thanks!
Hi hapuga,
Those details left outside to keep article more condensed and interesting 🙂
I was planning to fight shadow “swimming”, but the shadows are detailed enough and camera movements are fast and “coarse”, so the effect is not noticeable in the game.
I have tweaked settings to reduce Peter-panning, yet on some test PCs it reveals itself. I’m not sure why exactly, could be chosen depth buffer bit-depth altered?
Acne still happens sometime on mountain slopes (shadow patches from nowhere), quite rarely and I hope when terrain textures will be there, they will mask the acne even more.
There are several things that you can do.
All shadow problems are depth related, therefore, you could allow a 32 bit depth buffer. You could switch to logarithmic depth, instead of linear – this greatly increases precision not only with shadows, but with thin, long, overlapping geometry. Alternatively, you could try reworking your worldspace coordinates to be mostly in the -1…1 range, to maximize floating point precision benefits.
Specifically for shadows: you may use a shadow depth bias to alleviate your current problem with acne. Basic bias needs some fine-tuning, as it is compromise between acne and peter-panning. subtracting a tiny fraction from your current object pixel depth will “sink” it under, therefore, you will see less acne. The correct way, of course, would be to have the slope calculated for all vertices, then you can have dynamic bias that will be very accurate. Also, if your terrain is static, baking shadows will yield very good results, both performance-wise and visually.
All in all, shadows is the most hacky visual effect in graphics, unless you are doing ray-tracing of course. Even Unreal and Unity have their little issues here and there.
Best of luck.
Oh, and one last thing that I forgot: be careful with your near/far plane size for the projection matrix. It controls your precision and affects it greatly.
Cheers!
Wow, thanks for insights! Luckily I have found about all those during those 2-3 weeks and mostly dealt with them 🙂
I recall you have wrote about participating in project? I have responded, but I never got reply from you again. Would you be interested in giving it another try?
Amazing! I love this project! 😀